In this article, I will walk you through the simple process of switching out your Segway Ninebot Max motor for a new one. Whether it be for repair reasons, or simply because you want to upgrade from an old Gen 1 motor to a newer Gen 2 motor.
I’ve probably disassembled and assembled upwards of 30 Segway Ninebot Max scooters to date so I feel comfortable saying that I got the process worked out pretty well.
Even if you’re a novice in electric scooter repairs, the process of changing a Ninebot Max G30 motor is so simple that I am fully confident that together we can get this thing done successfully. All you have to do is follow the step-by-step process and take your time.
Why Would You Change the Motor on Your Max G30?
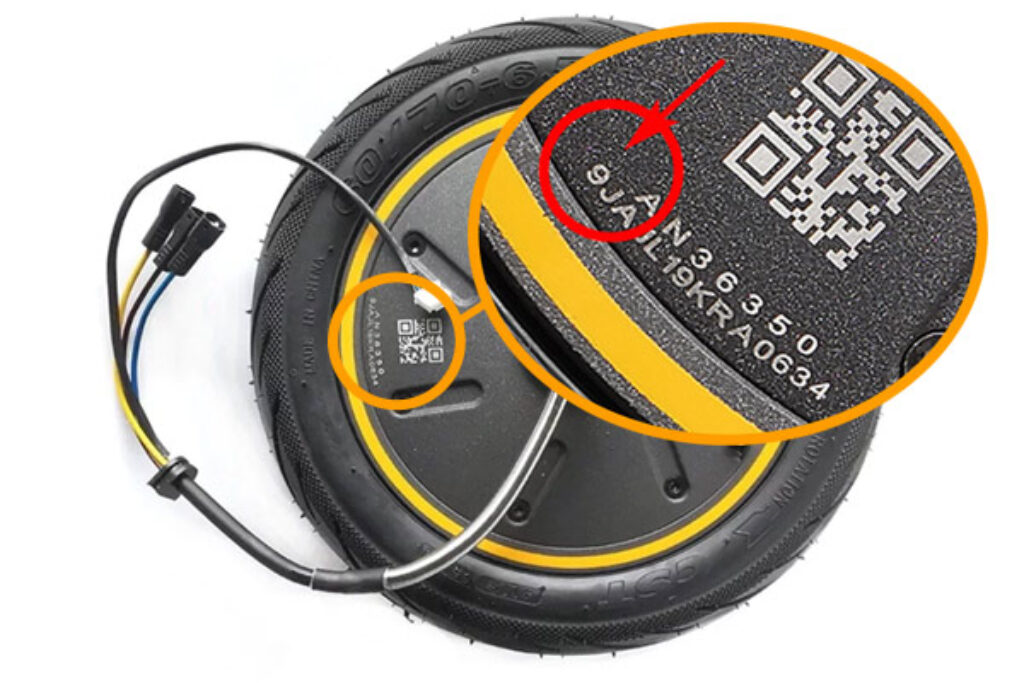
Serial number starting with 9 = Gen 2 motor
There are a few reasons that you might want to switch from a Gen 1 to a Gen 2 motor on your Segway Ninebot Max G30.
The first reason is the most obvious one, your Gen 1 motor is toast and your scooter isn’t functioning at all, or at least properly.
Another reason can be the fact that the Gen 1 motor has a lower top speed, and it loses a lot of that top speed as the battery percentage gets lower. Already at 70% the Gen 1 motor will have lost a large amount of its top-speed capabilities. Whilst the Gen 2 can not only reach higher top speeds, it is also able to reach that top speed far into the 40-30% battery levels.
If you want more reasons why you might want to switch to the Gen 2, we have an entire guide covering the different generations of Segway Ninebot Max Motors. It also covers how to spot which motor generation you have on your scooter.
Tools Needed to Change the Max G30 Motor
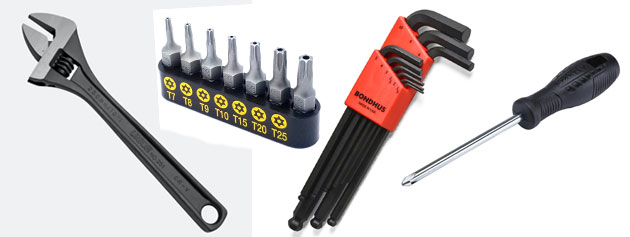
First, we want to make sure you got the right tools for the job ready at your disposal.
Here is a list of all the tools you need:
- Allen-key: M2.5 & M3
- Torx: T15 & Security Torx T25
- Adjustable Wrench
- Phillips Screwdriver
- Extra reflector and spare screws in case some of them are/or become worn down(Optional).
Step-by-step: How To Change your Segway Ninebot Max Motor
Now it’s time for us to walk through the step-by-step process of removing that old Gen 1 motor and putting in your newly acquired Gen 2 motor for superior speed and more efficient battery usage.
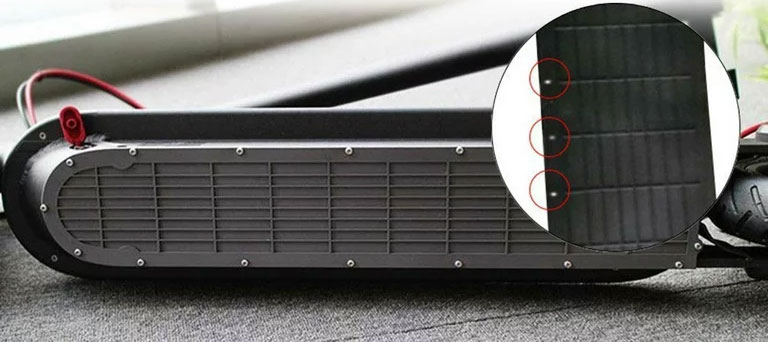
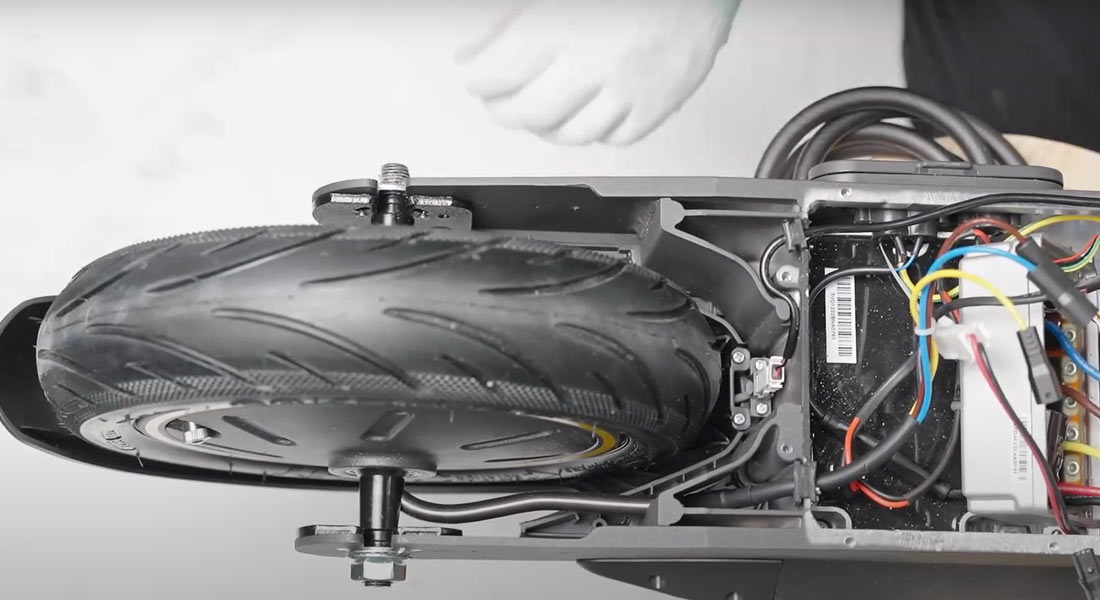
The cover has quite a few T15 Torx screws holding it in place depending on your model. Sometimes these screws can have some wear on them and be hard to remove so be careful when loosening them.
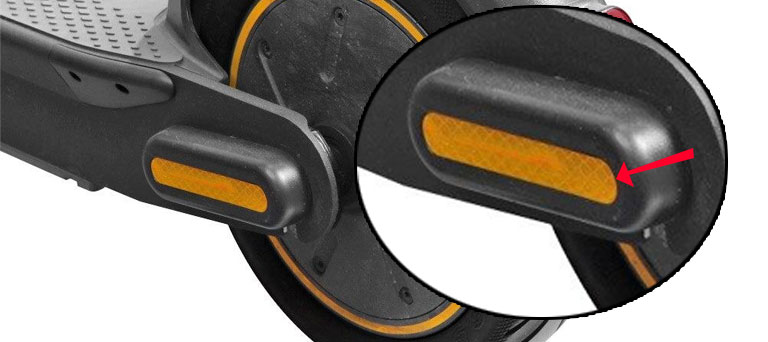
Peel off the reflectors on both sides of the motors to reveal 2 x M2.5 Allen bolts on either side. Unscrew these and remove the bolt guards.
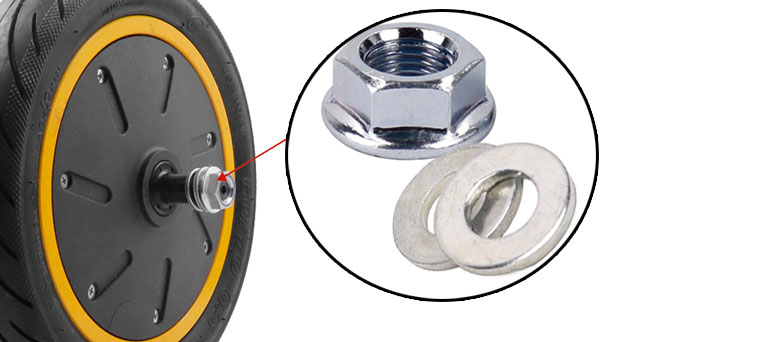
Now we’re going to remove the 2 large main bolts that hold the motor in place. These bolts can be removed with an adjustable wrench. I would suggest sitting on the footpad while releasing them for extra stability and strength.
If you’re Max is foldable you can skip this step. Lay your scooter down on the side and you can on some models see 4 x T25 Security-Torx screws in between the battery/esc compartment and the wheel. Remove these to release the plastic wire guard.
The ESC/Motor controller is easily removed by unscrewing 2 x M3 Allen screws that can be found on either side of the ESC(Silver aluminum box).
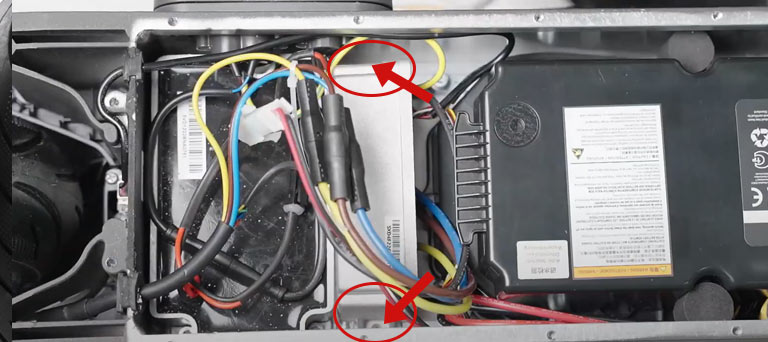
Time to unplug the 5-pin hall sensor connector from the ESC. And also the 3-phase cables from the motor. The easiest way is to just follow the motor wiring from the wire guard and into the ESC.

Thread the motor wires(Hall sensor and 3-phase cable) back to the ESC/Motor controller. Remember to make sure the rubber grommet is tight and well-sealed to avoid water escaping into the battery/ESC compartment.
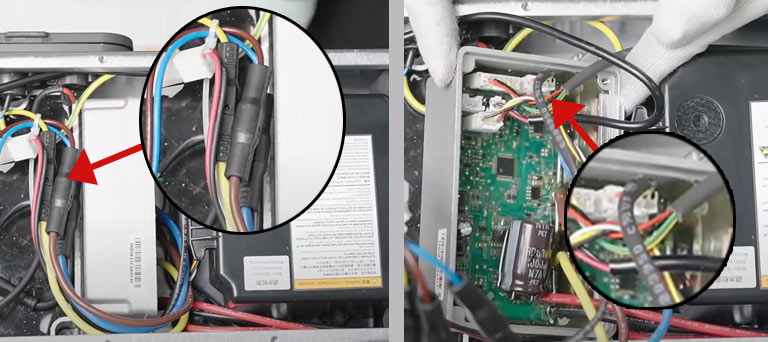
Now it’s time to connect the new motor hall sensor to the ESC and reconnect the 3-phase. Then screw back the ESC using the 2 x M3 Allen screws.
Now let’s put the motor in its slot and add on the lock ring. Then we want to tighten these bolts with our fingers, working a little on each side at a time to make sure the wheel is well-balanced. Continue with your fingers until you can’t anymore. Then use a wrench to tighten them fully a little at a time from each side of the motor.
Congratulations, your Gen 2 motor is now back in place and if you’ve followed my process to the dot everything should be working flawlessly by now. Give yourself a pat on the shoulder because you’ve done a heck of a job!
Conclusion
You’re ready to rock your new Gen 2 motor-equipped Max G30, so get out there and hit some new speed records!
I hope my step-by-step process was easy to follow so that you were able to make the switch of that old Gen 1 motor of yours for a fresh Gen 2 one without any issues. I did my best to make the process as straightforward and simple as possible. I even had my wife go through the process to make sure it was foolproof. Just kidding, she’s helped me fix some pretty complex hoverboard repairs before so she has some experience at this point.
If you have any suggestions or questions feel free to reach out.